12 Easy Thanksgiving Crafts for Kids
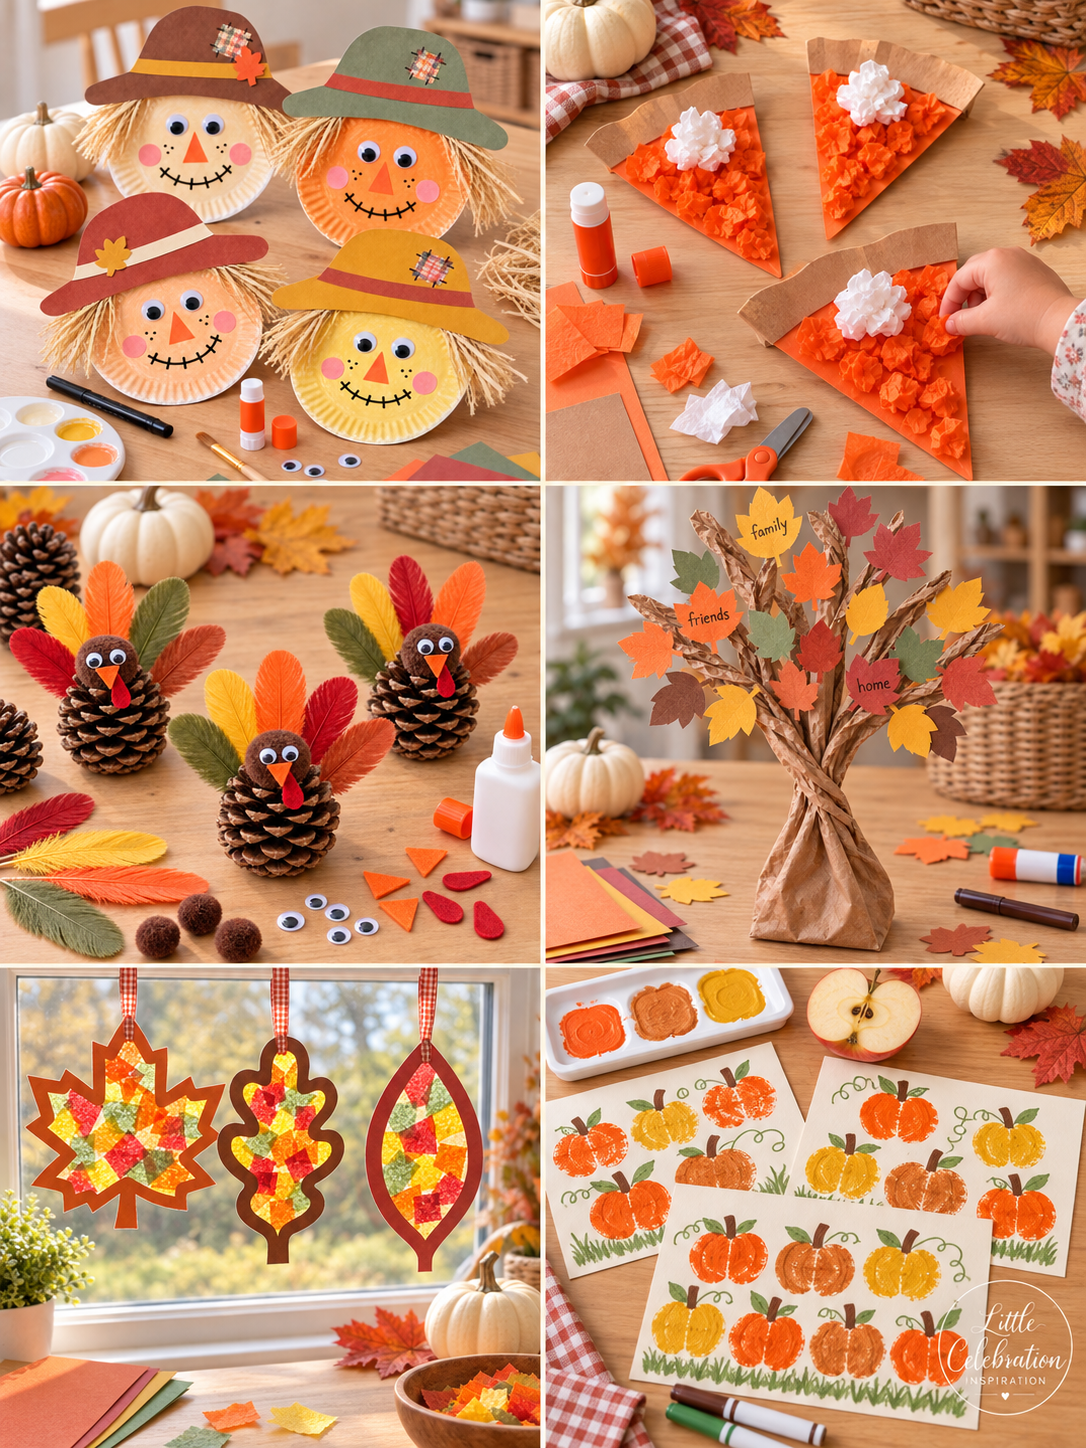
Thanksgiving is the perfect time to slow down, gather around the craft table, and let little hands create something special. These easy Thanksgiving crafts for kids use familiar supplies such as paper plates, construction paper, tissue paper, paint, paper bags, and pinecones. The projects are colorful, approachable, and easy to adapt for preschoolers, elementary-aged children, classrooms, playdates, or a cozy afternoon at home.
You will find plenty of turkeys, pumpkins, fall leaves, and gratitude-inspired ideas below. Some projects are quick enough for a short activity, while others invite children to practice painting, weaving, cutting, or arranging materials. Choose a favorite or set up several as Thanksgiving craft stations.
This post may contain affiliate links. If you purchase something through one of these links, I may earn a small commission at no additional cost to you.
1. Paper Plate Scarecrows
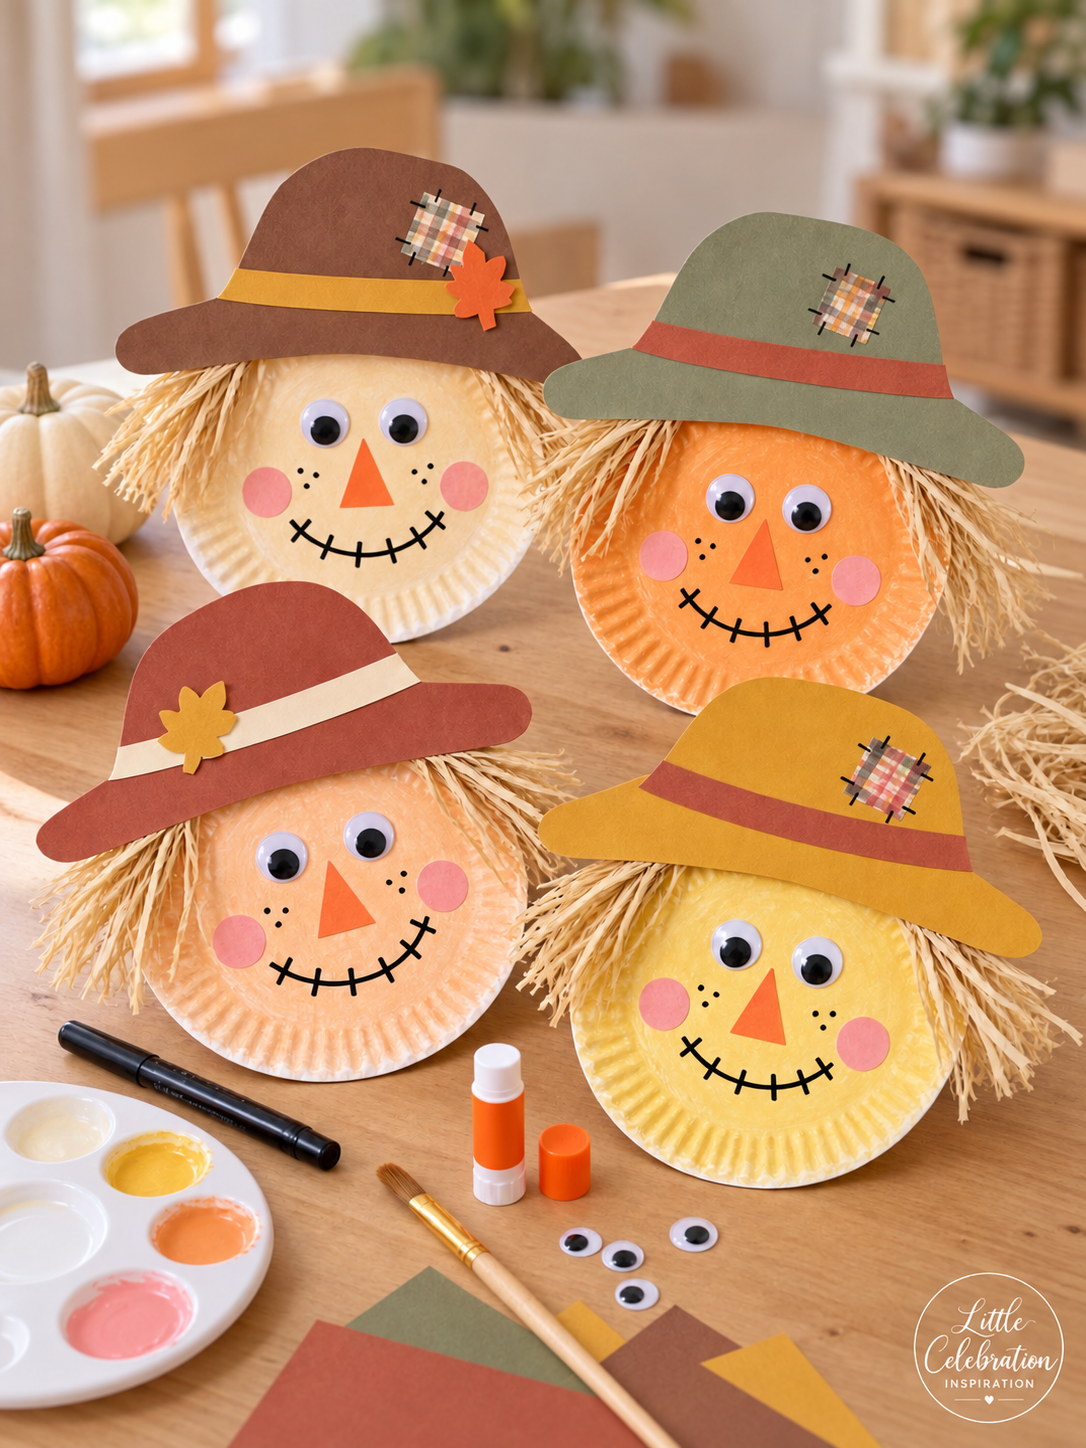
These cheerful paper plate scarecrows bring plenty of personality to the craft table. Children can choose their own colors for the face and hat, then add raffia hair and silly details to make each scarecrow unique.
Supplies (affiliate links):
Yellow or orange washable paint
Brown, rust, mustard, and sage paper
Natural raffia or shredded paper
Pink paper circles
Directions
1. Paint the front of the paper plate yellow or orange and allow it to dry completely.
2. Cut a wide-brimmed hat from construction paper. Add a contrasting band and a small paper leaf or plaid paper patch.
3. Glue short pieces of raffia around the upper sides of the plate to create straw hair.
4. Attach the hat over the raffia, then glue on googly eyes, an orange triangle nose, and pink cheeks.
5. Use a black marker to draw freckles and a stitched scarecrow smile.
Helpful tip: Precut the hat and facial pieces for younger children, then let them arrange and glue everything in place.
2. Tissue Paper Pumpkin Pie Craft
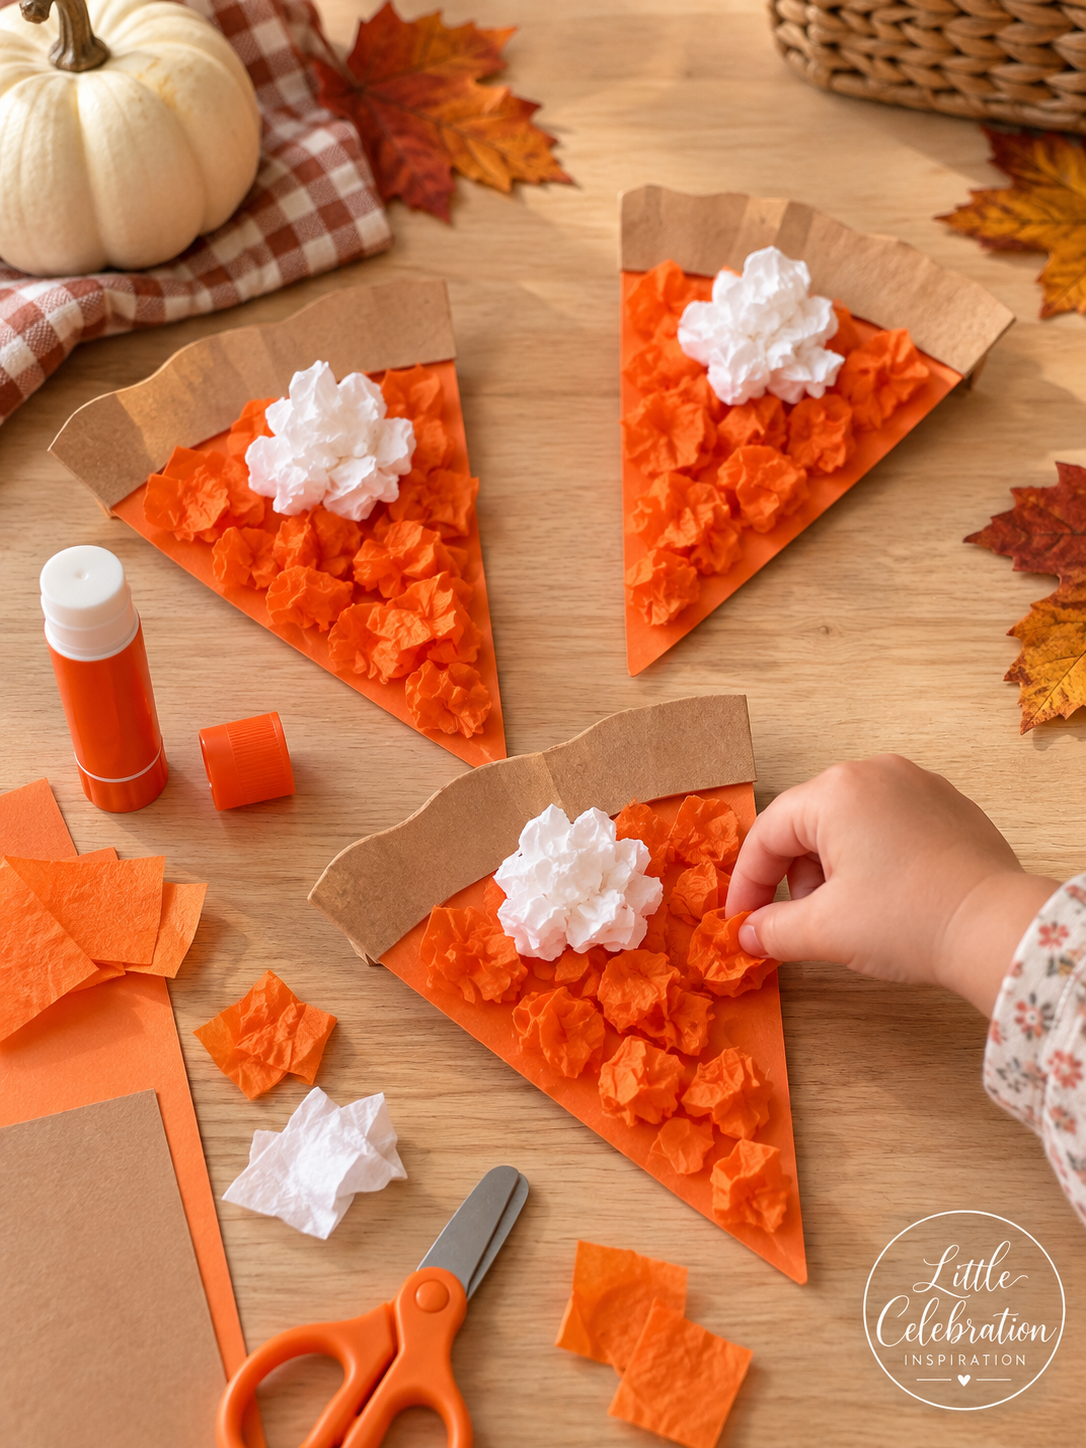
This pretend slice of pumpkin pie looks festive enough for the Thanksgiving table. Crumpled orange tissue paper gives the filling texture, while white tissue paper creates a fluffy dollop of whipped cream.
Supplies (affiliate links):
Orange cardstock or construction paper
Directions
1. Cut a large triangle from orange paper for the pie filling.
2. Cut a brown strip slightly wider than the top edge of the triangle and fold or crimp it gently to resemble a crust.
3. Tear or cut orange tissue paper into small squares, crumple each piece, and glue the pieces closely together over the orange triangle.
4. Crumple several white tissue-paper squares and glue them in a cluster near the center for whipped cream.
5. Glue the brown crust strip across the wide end of the slice and let the project dry flat.
Helpful tip: Place the tissue-paper squares in separate bowls so children can work independently without the materials scattering.
3. Handprint Paper Plate Turkey
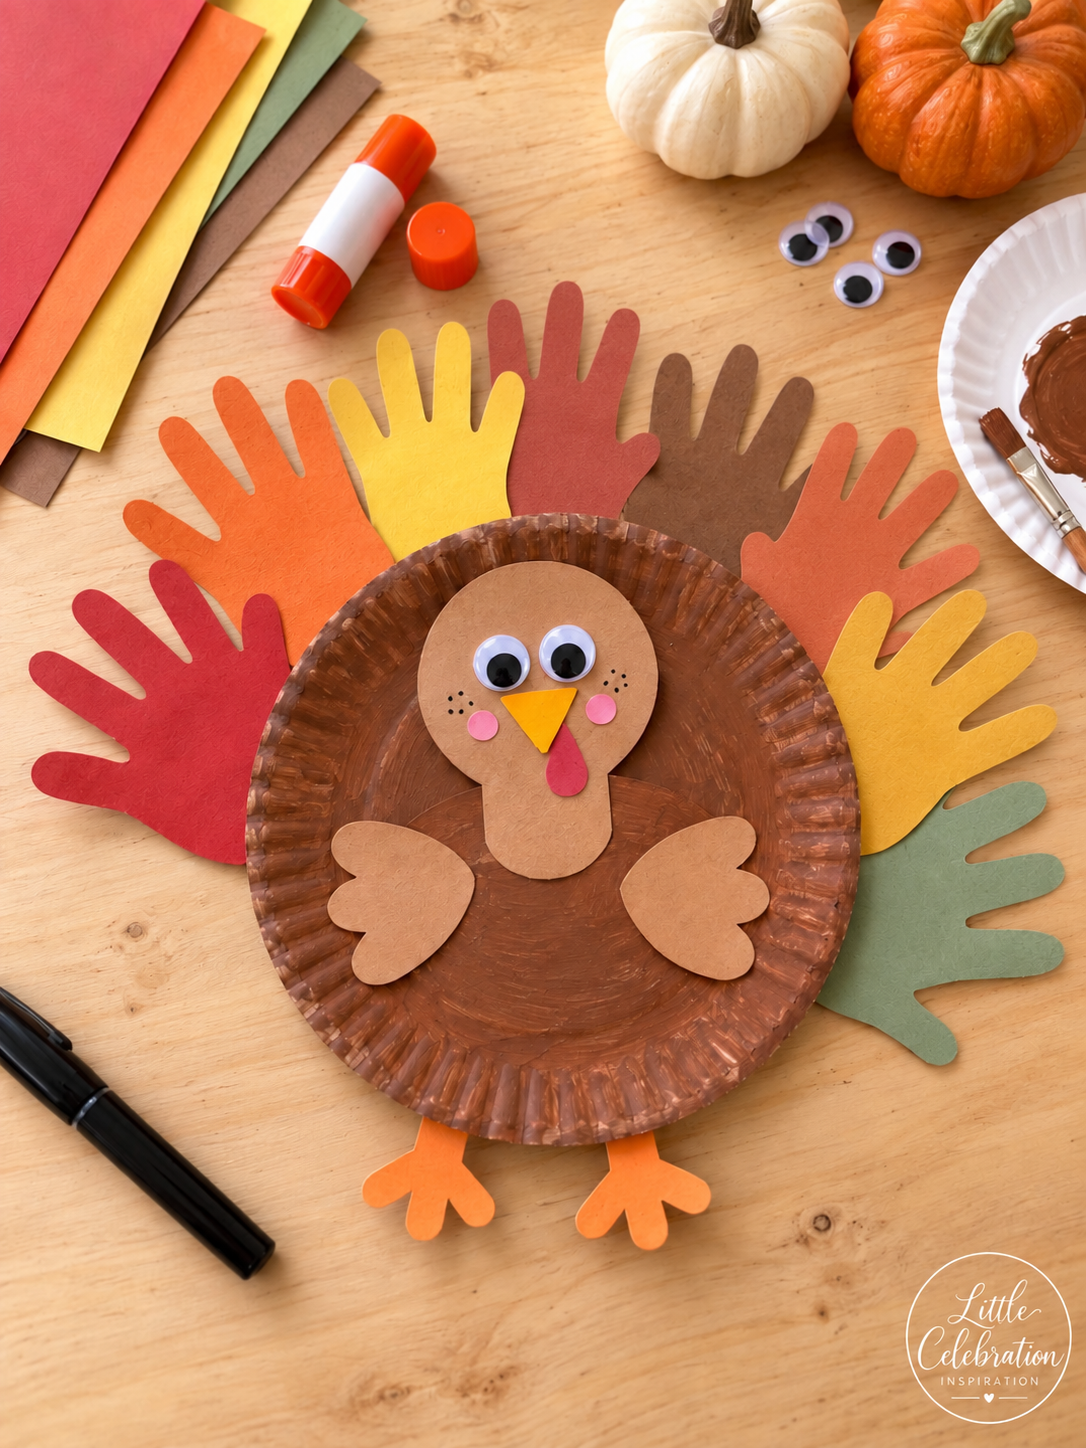
Colorful paper handprints form the oversized feather fan on this classic Thanksgiving turkey. It is a fun keepsake-style project and a great way to include several family members' handprints in one craft.
Supplies (affiliate links):
Construction paper in fall colors
Tan, orange, red, and yellow construction paper
Directions
1. Paint the paper plate brown and leave it to dry.
2. Trace hands onto several colors of construction paper and cut out the handprints.
3. Fan the handprints around the back edge of the plate and glue them in place as feathers.
4. Cut a rounded head and neck, two wings, an orange triangle beak, a red wattle, and two orange feet.
5. Glue the head and wings to the front of the plate. Add googly eyes, the beak, wattle, cheeks, feet, and small marker details.
Helpful tip: Write children's names and the year on the back if you want to save the turkey as a Thanksgiving keepsake.
4. Paper Plate Fall Leaf Wreath
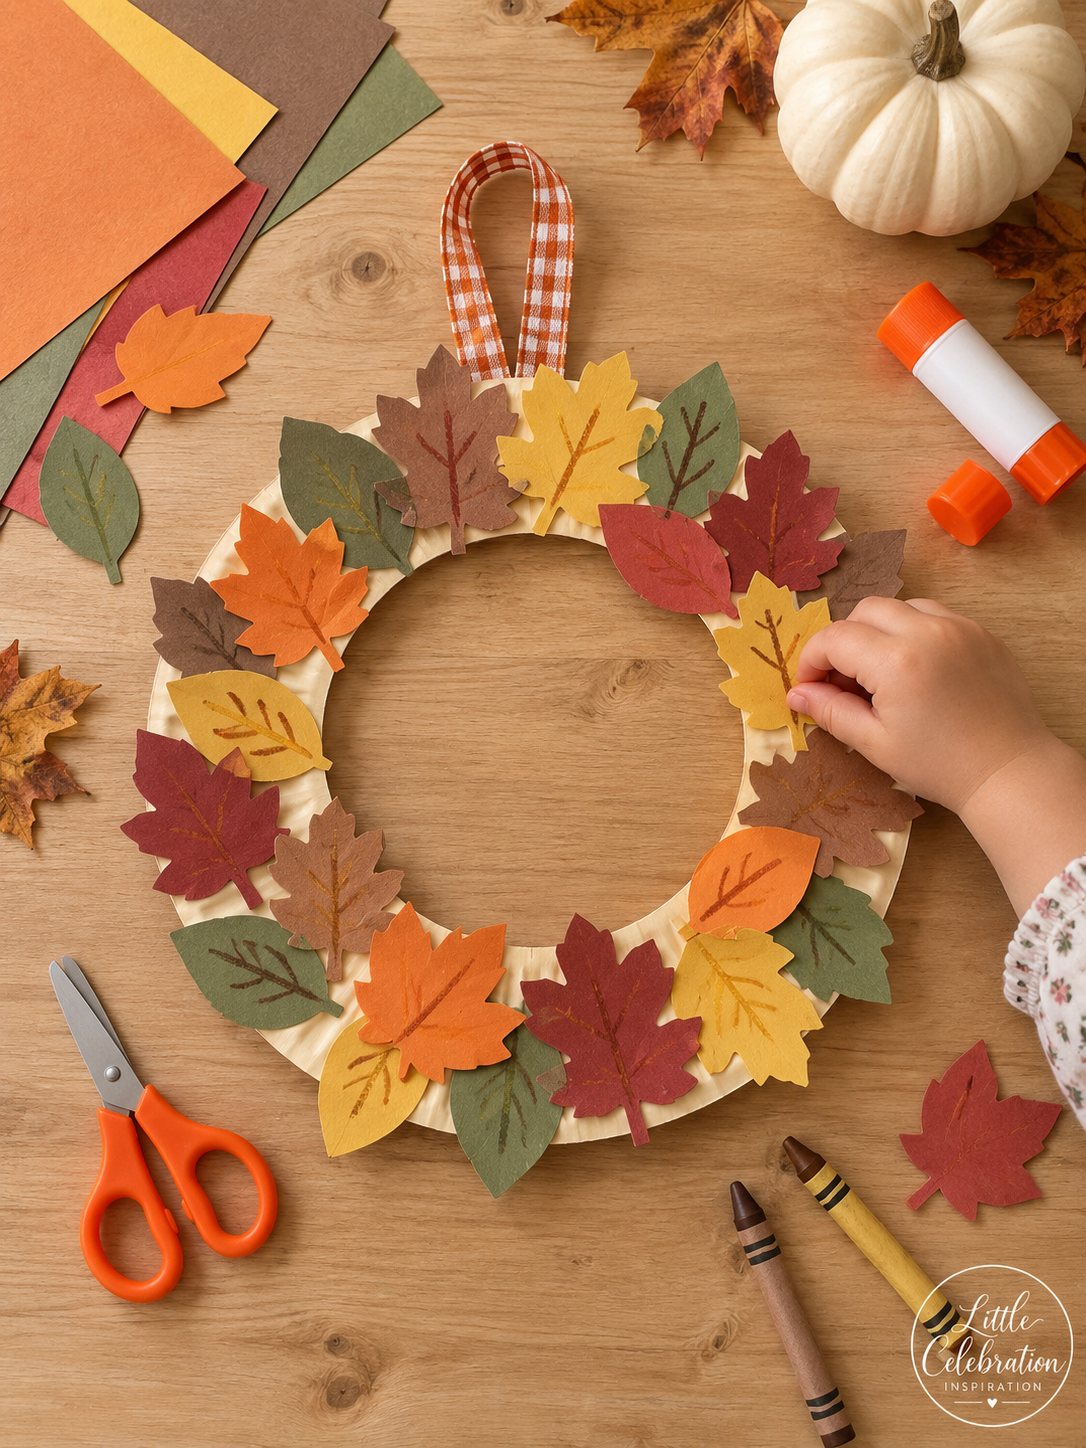
A paper plate makes an easy base for a bright autumn wreath. Layering leaves in different shapes and colors helps children practice arranging a repeating pattern.
Supplies (affiliate links):
Red, orange, yellow, brown, and green construction paper
Leaf templates or real leaves for tracing
Directions
1. Cut the center from a paper plate to create a sturdy wreath ring.
2. Trace several leaf shapes onto construction paper and cut them out.
3. Arrange the paper leaves around the ring, overlapping the edges so the plate is covered.
4. Glue each leaf in place and allow the wreath to dry.
5. Attach a ribbon or twine loop to the back for hanging.
Helpful tip: Mix simple oval leaves with a few maple or oak shapes so the project looks detailed without requiring every leaf to be difficult to cut.
5. Popsicle Stick Corn Cobs
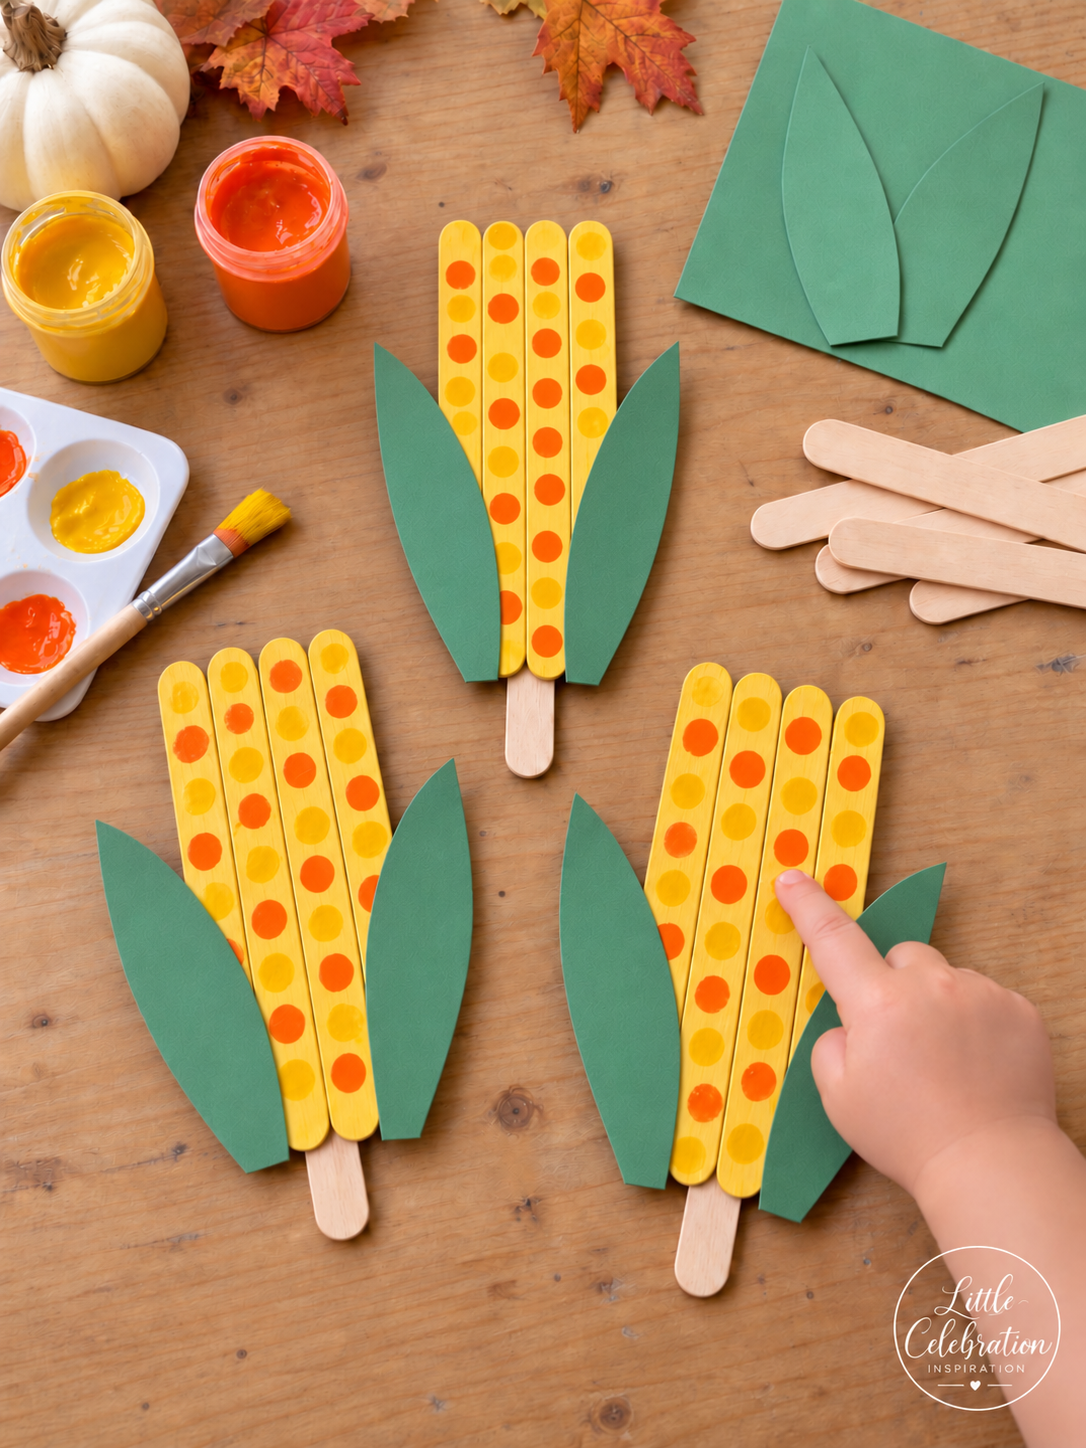
Painted craft sticks and small paper kernels turn into a cheerful ear of corn. This project works well for a Thanksgiving classroom craft or a fall harvest theme.
Supplies (affiliate links):
Yellow, cream, and orange paint
Directions
1. Cut a long oval corn-cob base from cardstock or thin cardboard.
2. Paint craft sticks in shades of yellow, cream, and orange and allow them to dry.
3. Arrange the sticks side by side over the base and glue them down. Trim or stagger the ends if needed to maintain an oval shape.
4. Cut two long husk leaves from green construction paper.
5. Glue the husks along the lower sides of the corn cob, folding the tips slightly outward.
Helpful tip: For younger children, use mini craft sticks or precut paper rectangles as kernels instead of requiring any trimming.
6. Pinecone Turkeys
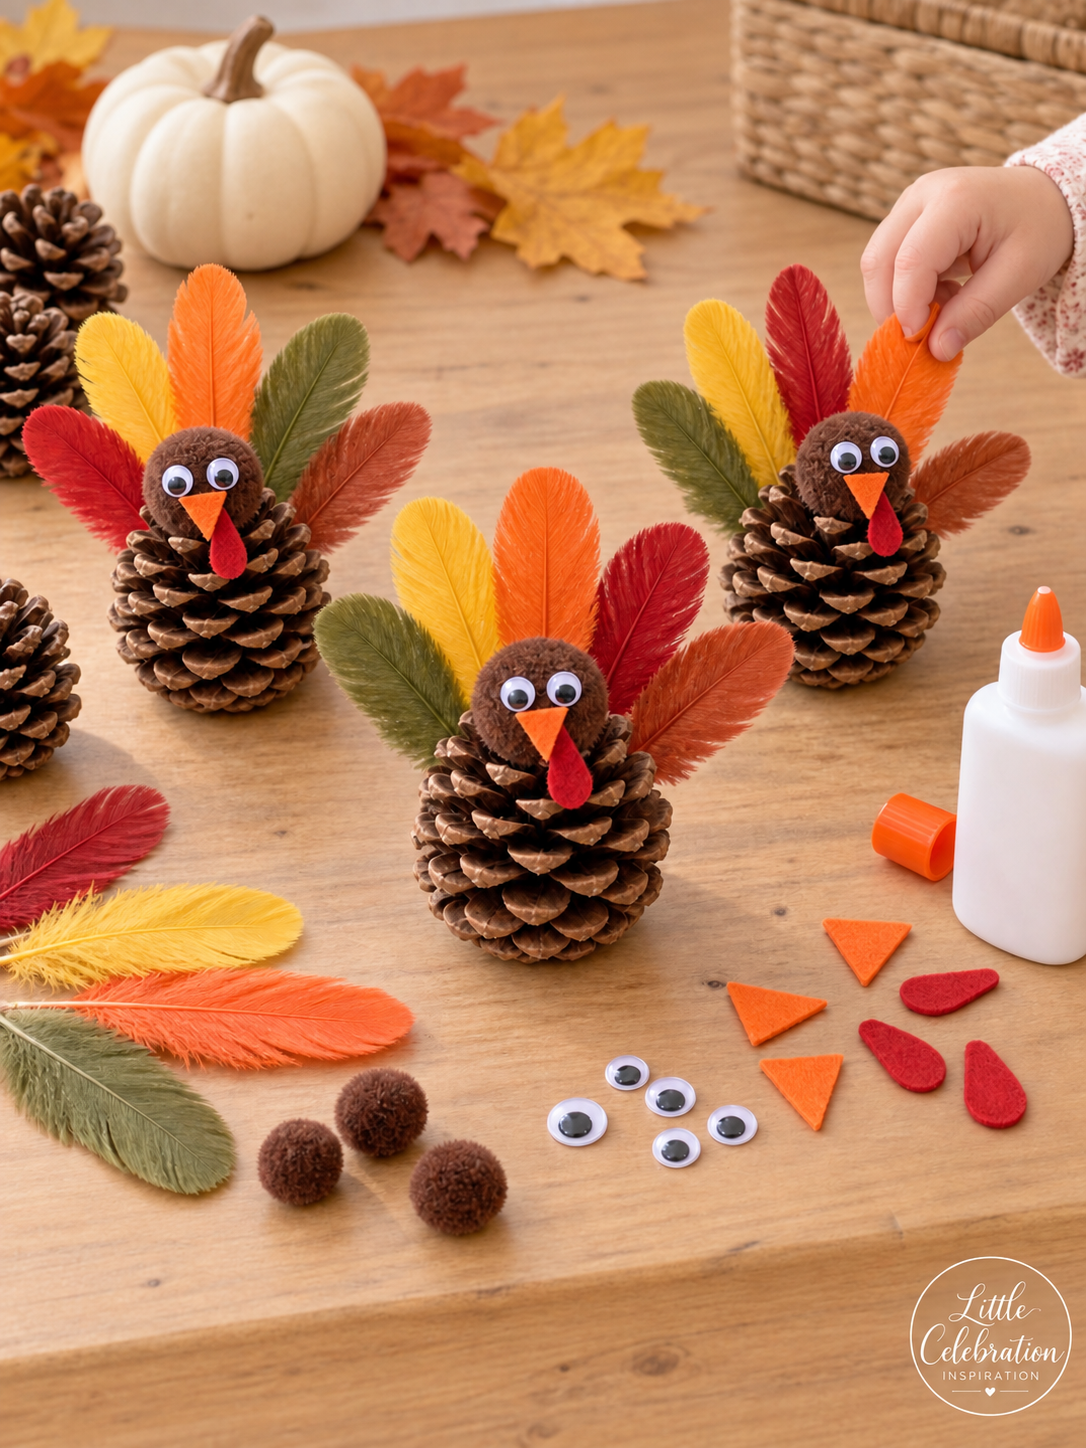
Pinecones make naturally textured turkey bodies, and bright craft feathers create a full fan behind them. These little turkeys look adorable grouped together as Thanksgiving decorations.
Supplies (affiliate links):
Clean, dry pinecones with flat bases
Orange and red felt or cardstock
Tacky craft glue or low-temperature hot glue for adult use
Directions
1. Set each pinecone upright and make sure it stands steadily.
2. Glue several feathers into the back scales of the pinecone, spreading the colors into a fan.
3. Glue a brown pom-pom near the top front of the pinecone for the head.
4. Add two googly eyes, a small orange triangle beak, and a red felt wattle.
5. Allow the glue to dry fully before moving or displaying the turkey.
Helpful tip: An adult should handle hot glue. Tacky craft glue is safer for children, although it will need more drying time.
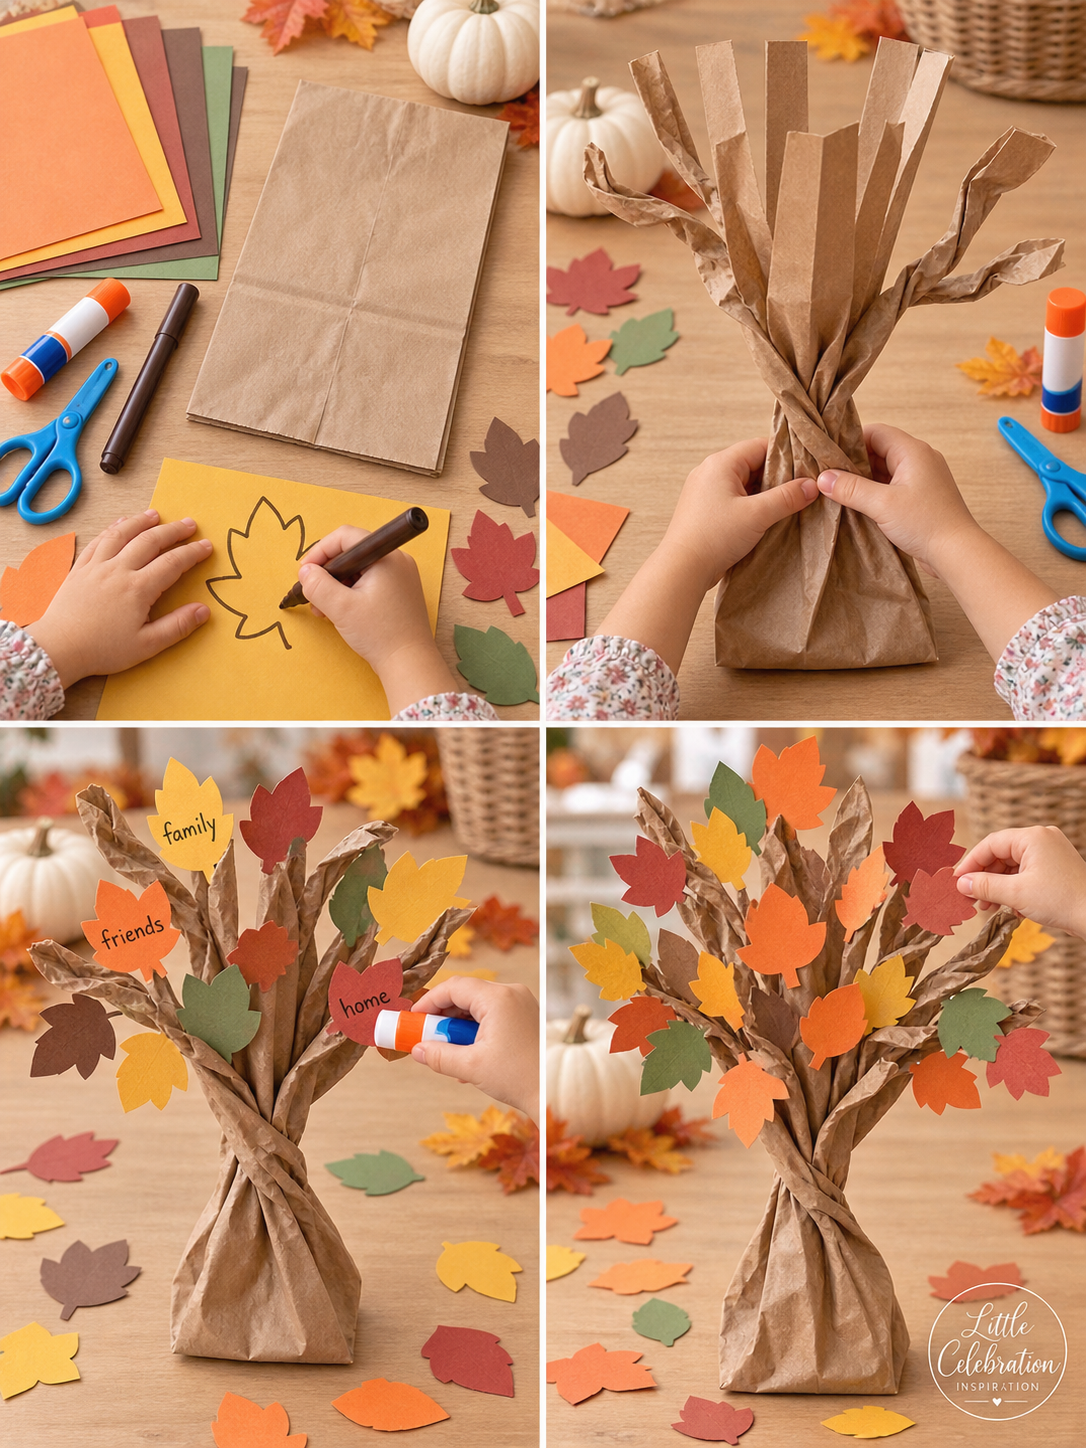
7. Thankful Tree from a Paper Lunch Bag
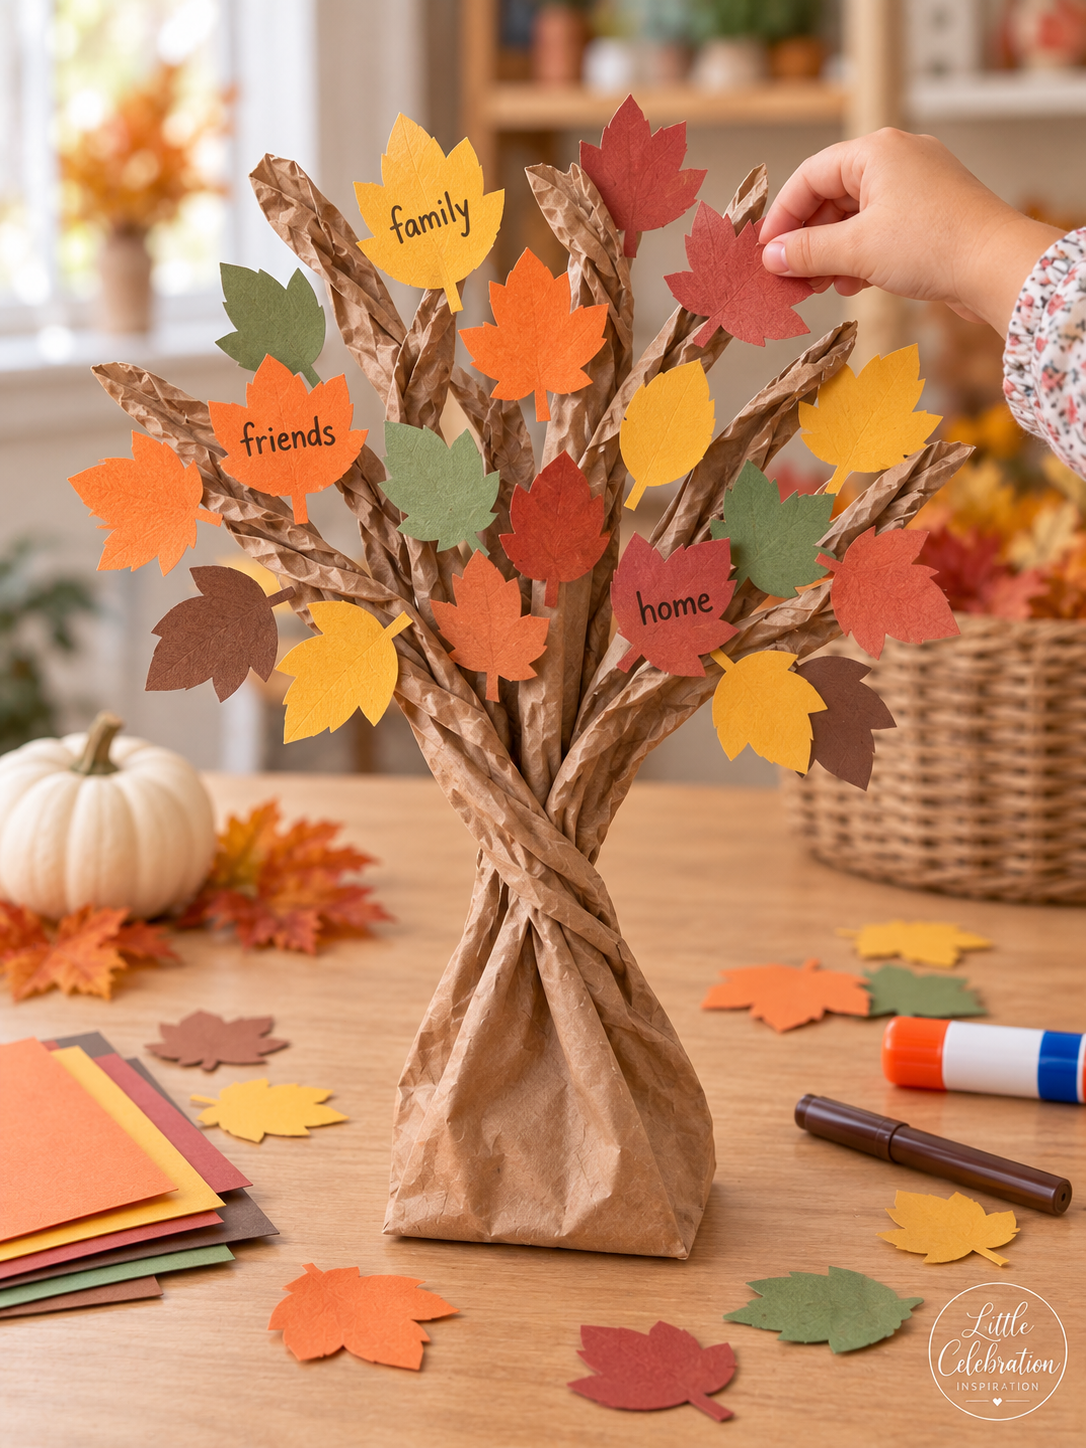
This three-dimensional Thankful Tree doubles as a meaningful Thanksgiving activity. Family members can write something they appreciate on individual paper leaves before adding them to the branches.
Supplies (affiliate links):
Construction paper in fall colors
Directions
1. Keep the bottom of the lunch bag closed and cut several vertical strips from the open edge down toward the middle of the bag.
2. Twist the uncut lower portion of the bag to form a trunk.
3. Separate and twist the cut strips into individual branches, bending some outward to create a full tree shape.
4. Cut leaf shapes from red, orange, yellow, green, and brown paper.
5. Write one person, place, memory, or blessing on each leaf, then glue the leaves to the branches.
Helpful tip: Invite everyone to add a new leaf during Thanksgiving week and read the finished leaves together at dinner.
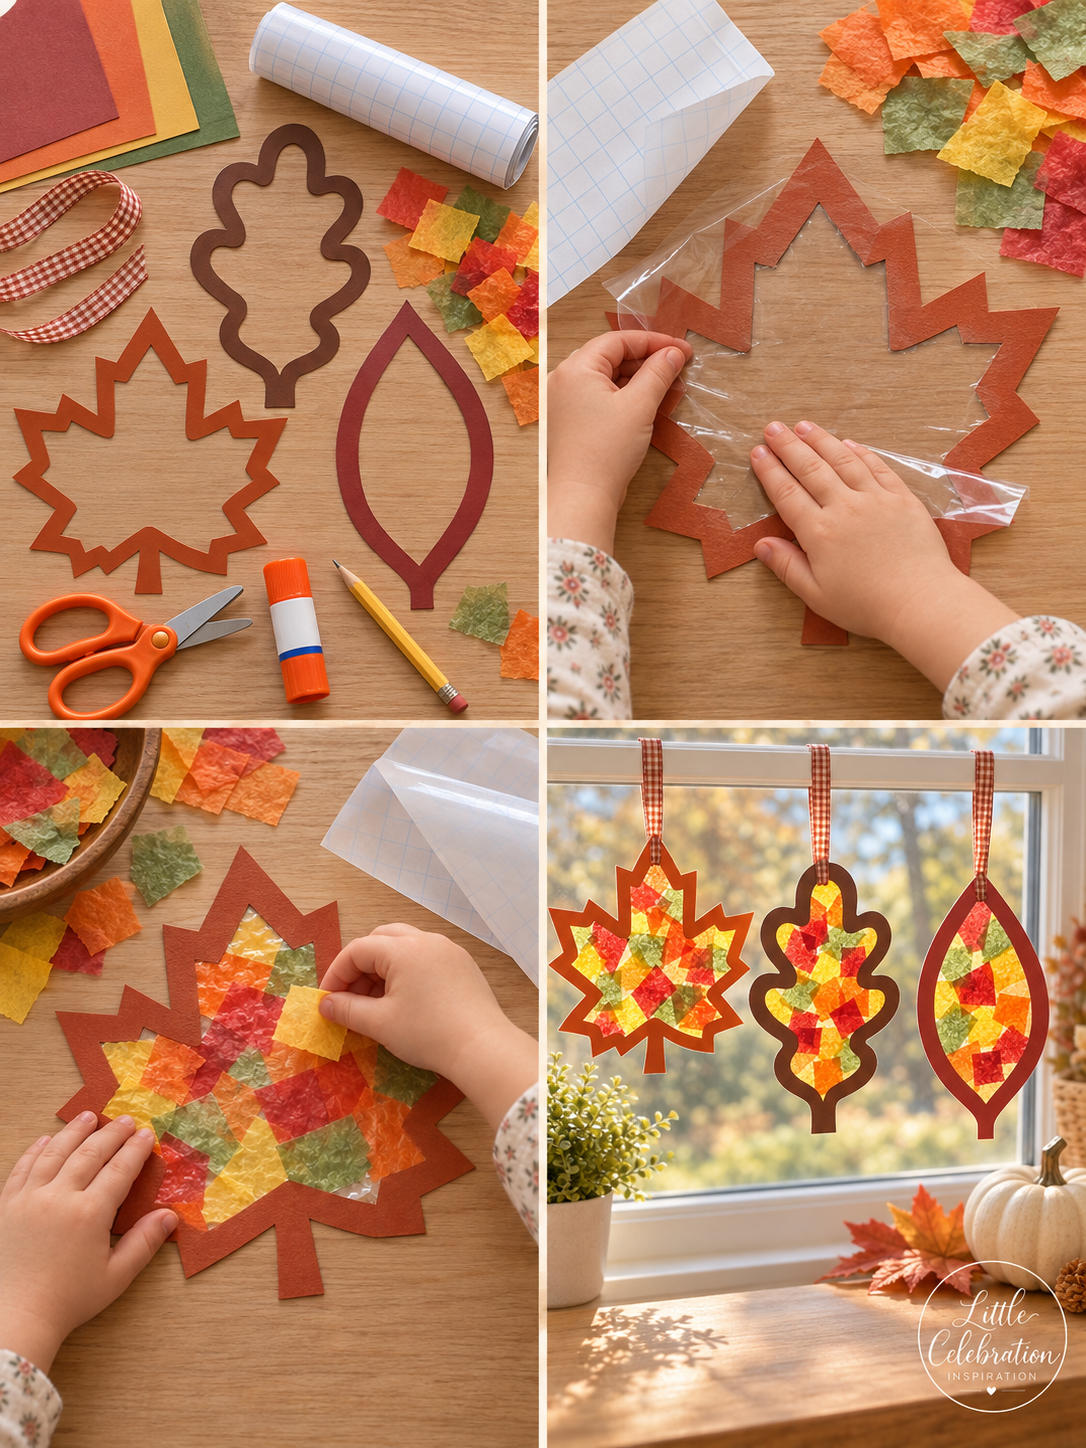
8. Fall Leaf Tissue Paper Suncatchers
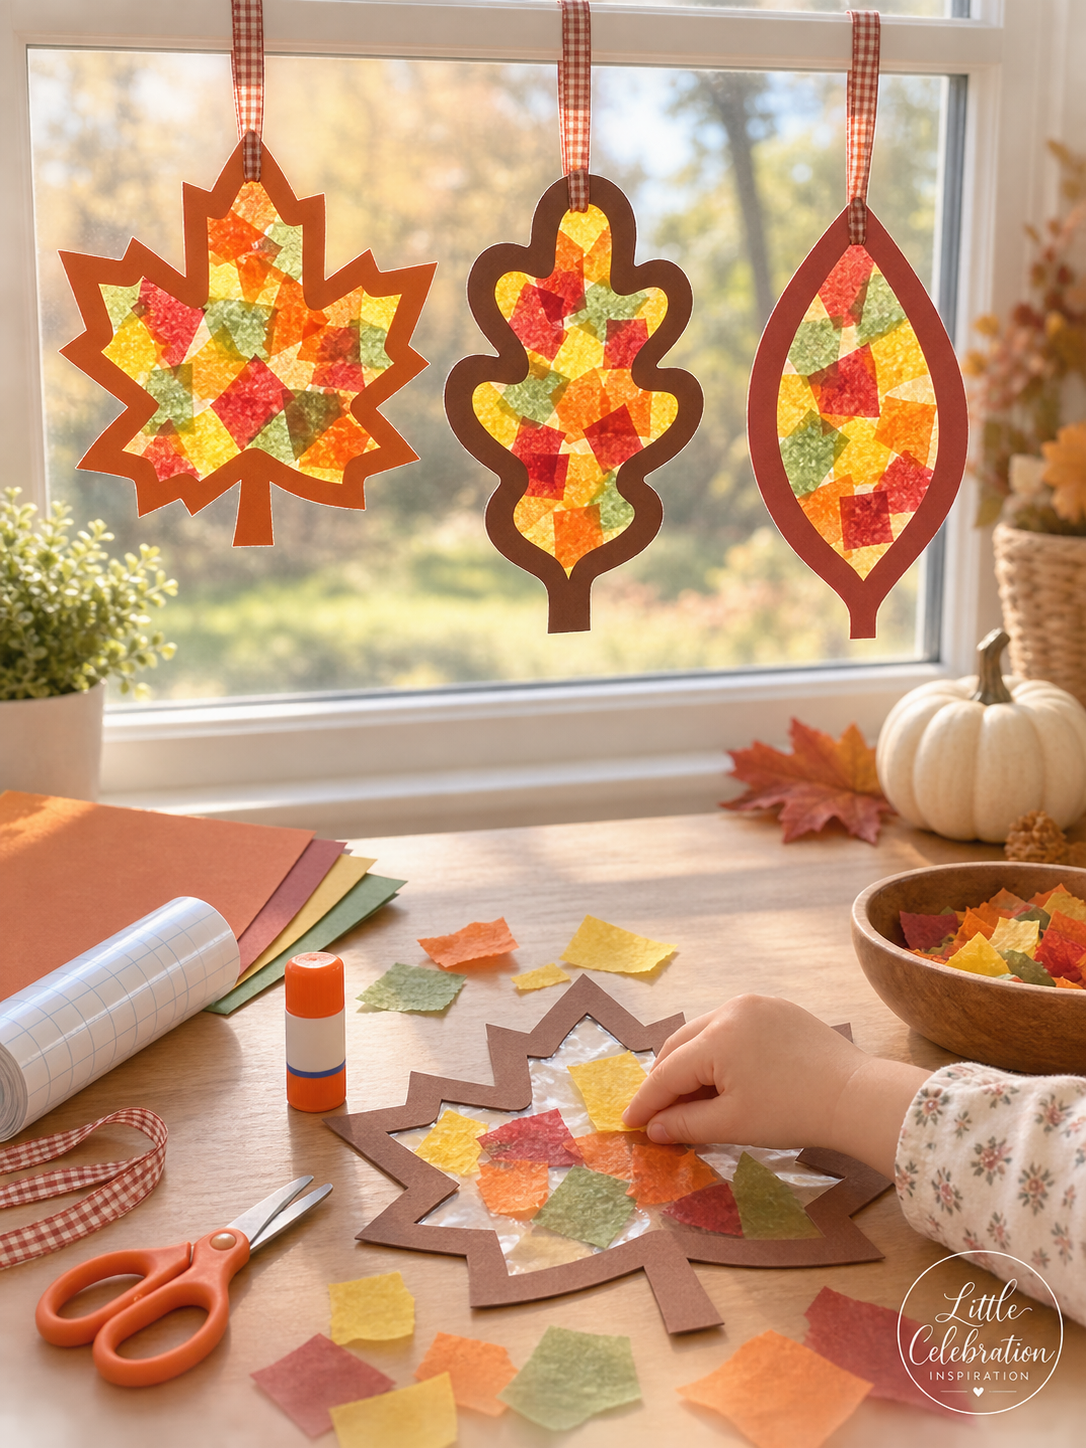
These translucent fall leaves glow beautifully in a sunny window. Small tissue-paper pieces make the project colorful while keeping the process easy for young children.
Supplies (affiliate links):
Brown, rust, or deep red cardstock
Tissue paper in red, orange, yellow, and green
Directions
1. Trace a large leaf onto cardstock, then draw a smaller matching leaf inside it to create a thick frame. Cut out both shapes.
2. Cut two pieces of clear contact paper slightly larger than the leaf opening.
3. Remove the backing from one piece and press it sticky-side up beneath the cardstock frame.
4. Place overlapping tissue-paper squares over the sticky opening until it is filled.
5. Seal the tissue paper with the second piece of contact paper, trim around the frame, punch a hole at the top, and add ribbon for hanging.
Helpful tip: Peel back only part of the contact-paper liner at first, then remove the rest gradually to make it easier to position without wrinkles.
9. Fork Painted Turkey Art
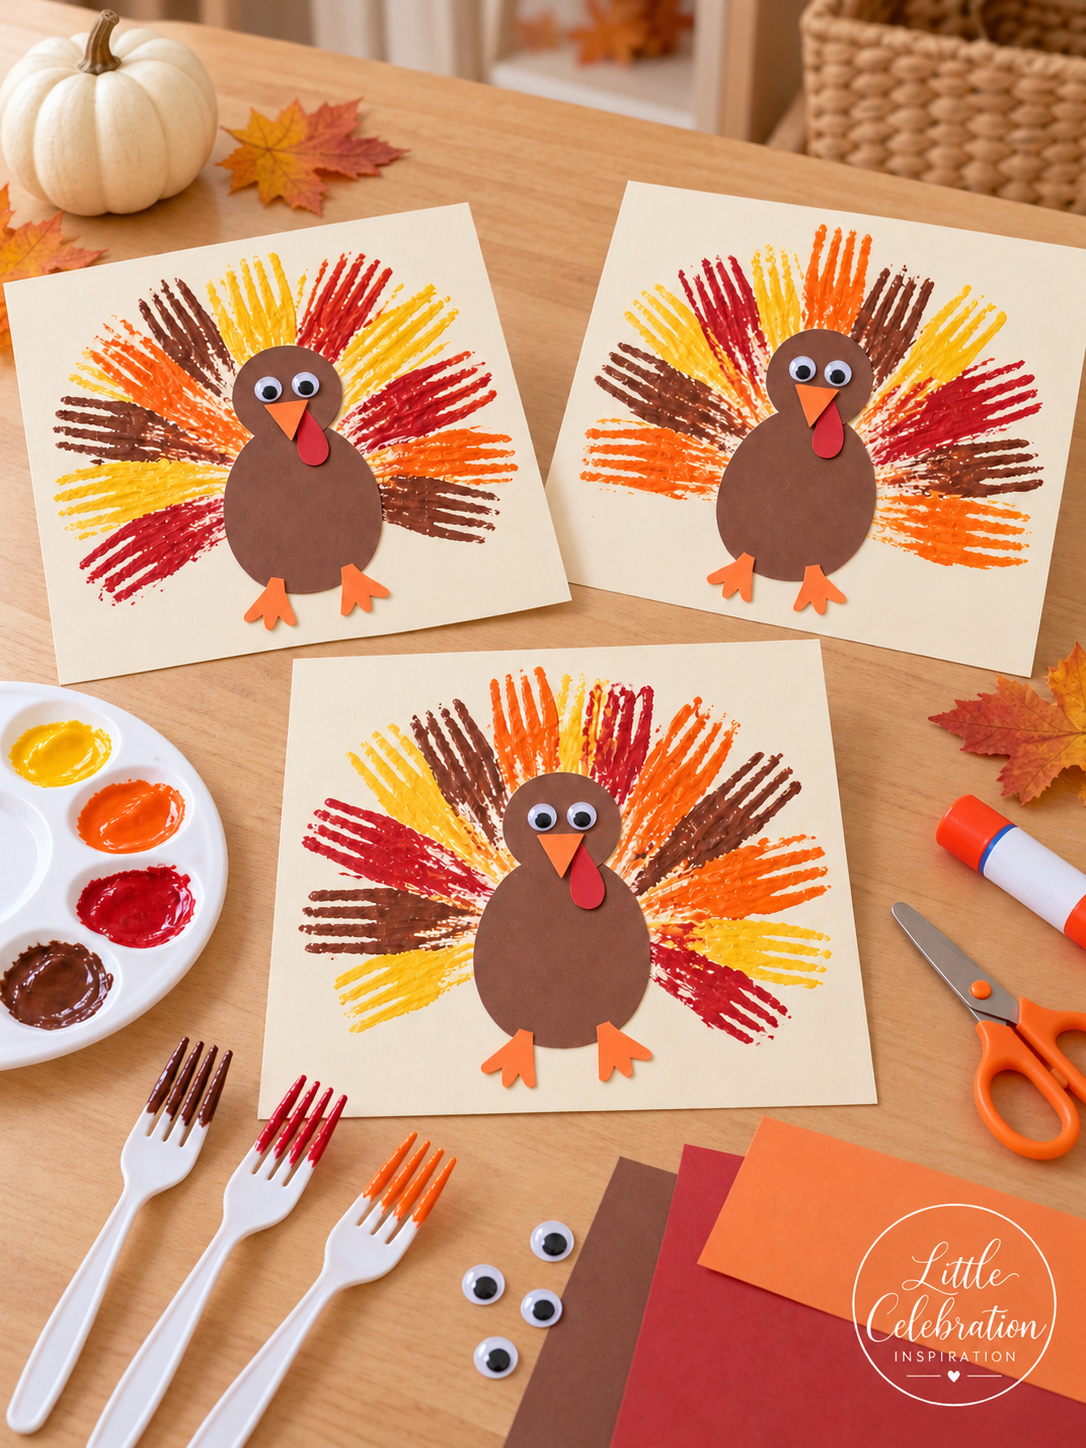
A plastic fork makes quick, textured feather marks for this colorful turkey painting. Children can layer several fall paint colors before adding the simple paper turkey body.
Supplies (affiliate links):
Washable paint in red, orange, yellow, and brown
Brown, orange, and red construction paper
Directions
1. Pour small amounts of the paint colors onto a washable palette or paper plate.
2. Dip the back of a plastic fork lightly into the first paint color and press or drag it outward on the cardstock to make feather marks.
3. Repeat with the other colors, arranging the marks in a wide fan. Allow the paint to dry.
4. Cut a brown circle for the head and a larger brown oval for the body. Cut an orange beak and feet and a red wattle.
5. Glue the body over the center of the painted feathers, then add the head, eyes, beak, wattle, and feet.
Helpful tip: Use a separate fork for each paint color to keep the colors bright and prevent muddy mixing.
10. Paper Bag Turkey Puppets
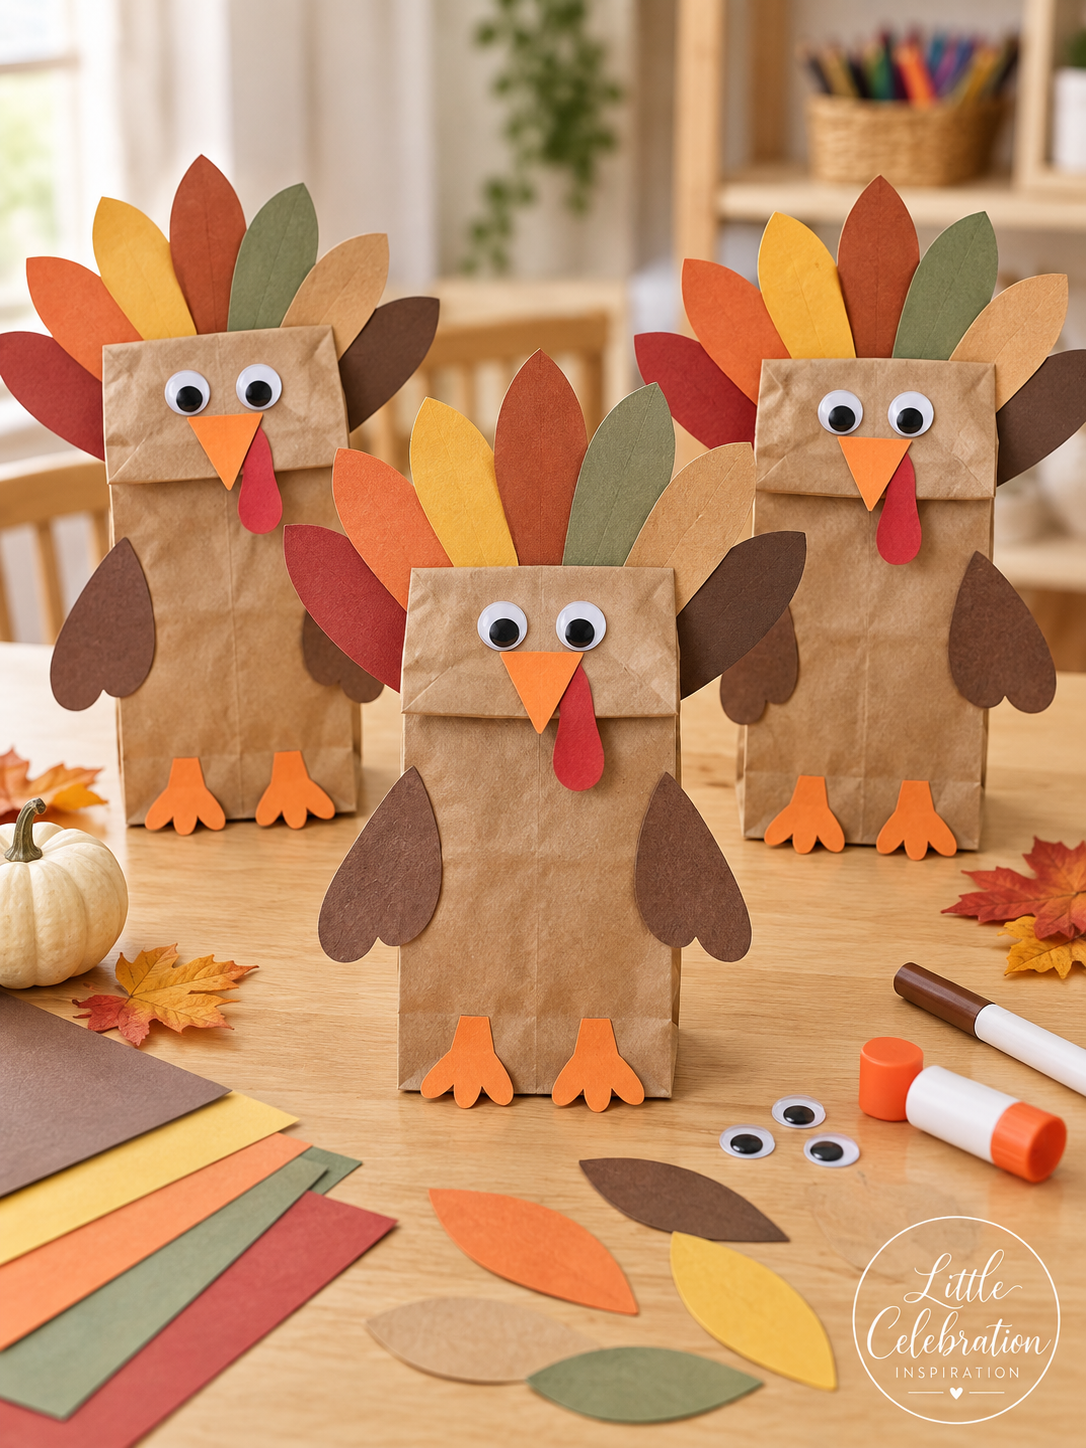
Brown paper lunch bags become playful turkey puppets with colorful paper feathers and oversized googly eyes. Children can use the finished puppets for songs, stories, or a Thanksgiving puppet show.
Supplies (affiliate links):
Construction paper in red, orange, yellow, green, tan, and brown
Directions
1. Place the lunch bag flat with the folded bottom flap facing up. This flap will become the turkey's face.
2. Cut several long feather shapes from assorted fall-colored paper.
3. Fan and glue the feathers to the back of the bag so they extend above and around the puppet.
4. Glue googly eyes, an orange triangle beak, and a red wattle to the flap.
5. Add brown wings to the sides and orange feet near the bottom, then allow the puppet to dry before playing.
Helpful tip: Keep all facial pieces on the folded flap so the turkey's mouth moves when a child places a hand inside the bag.
11. Woven Paper Pumpkins
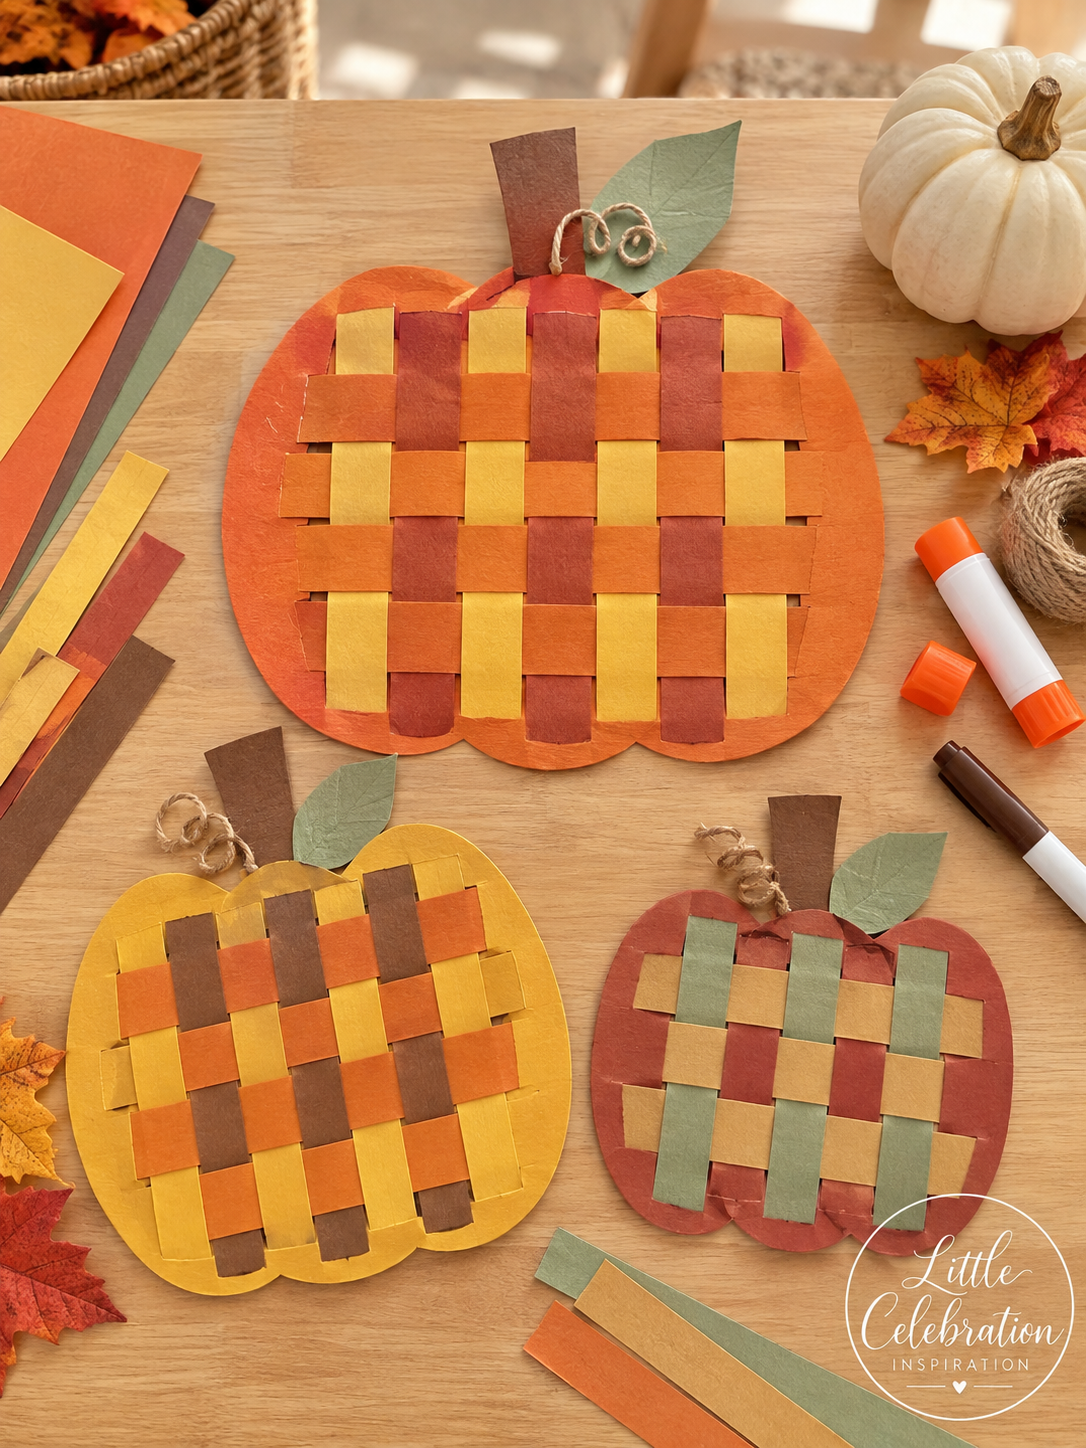
Paper weaving adds color, texture, and fine-motor practice to these festive pumpkins. Once children understand the over-and-under pattern, they can experiment with different combinations of fall-colored strips.
Supplies (affiliate links):
Orange, yellow, rust, brown, tan, and sage cardstock or construction paper
Twine, optional
Directions
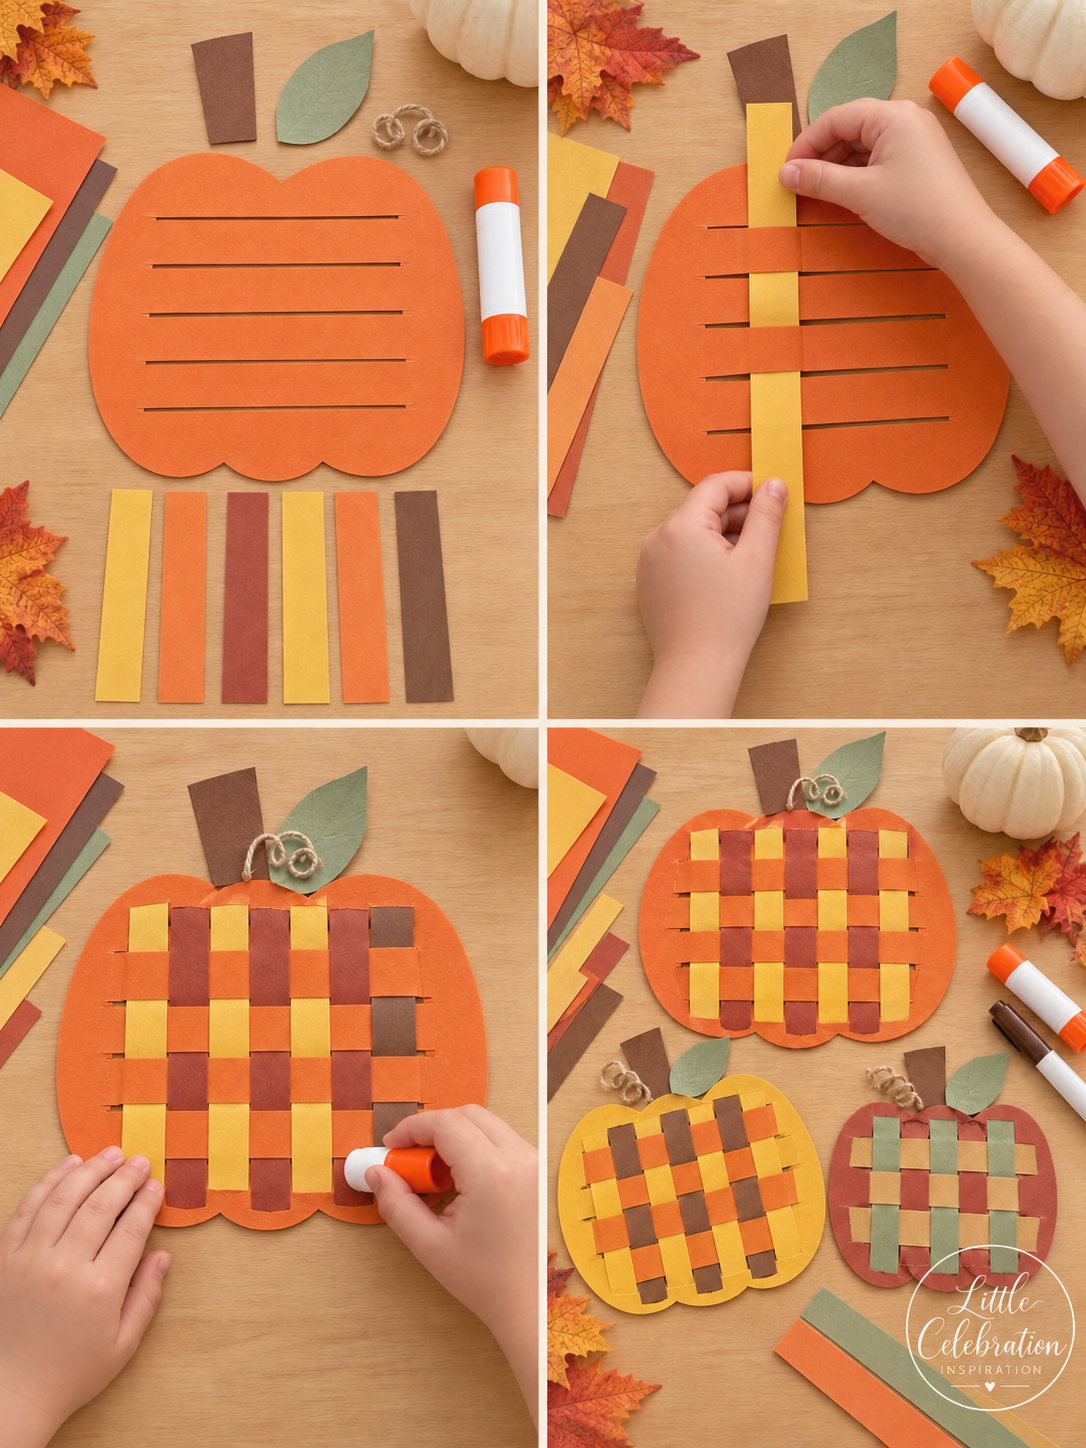
1. Cut a large pumpkin shape from sturdy paper. Fold it gently or use a ruler to mark several evenly spaced horizontal lines, leaving an uncut border around every edge.
2. Cut along the marked lines to create parallel slits through the center of the pumpkin.
3. Cut long paper strips in several fall colors. Weave the first strip over and under the pumpkin sections, then alternate the pattern for the next strip.
4. Continue until the center is filled. Turn the pumpkin over and glue the loose strip ends securely to the back.
5. Trim excess paper, then glue on a brown stem, green leaf, and optional curled twine vine.
Helpful tip: Glue only the loose ends on the back after the weaving is complete. Keeping glue away from the front preserves the clean woven pattern.
12. Apple Stamped Pumpkin Patch
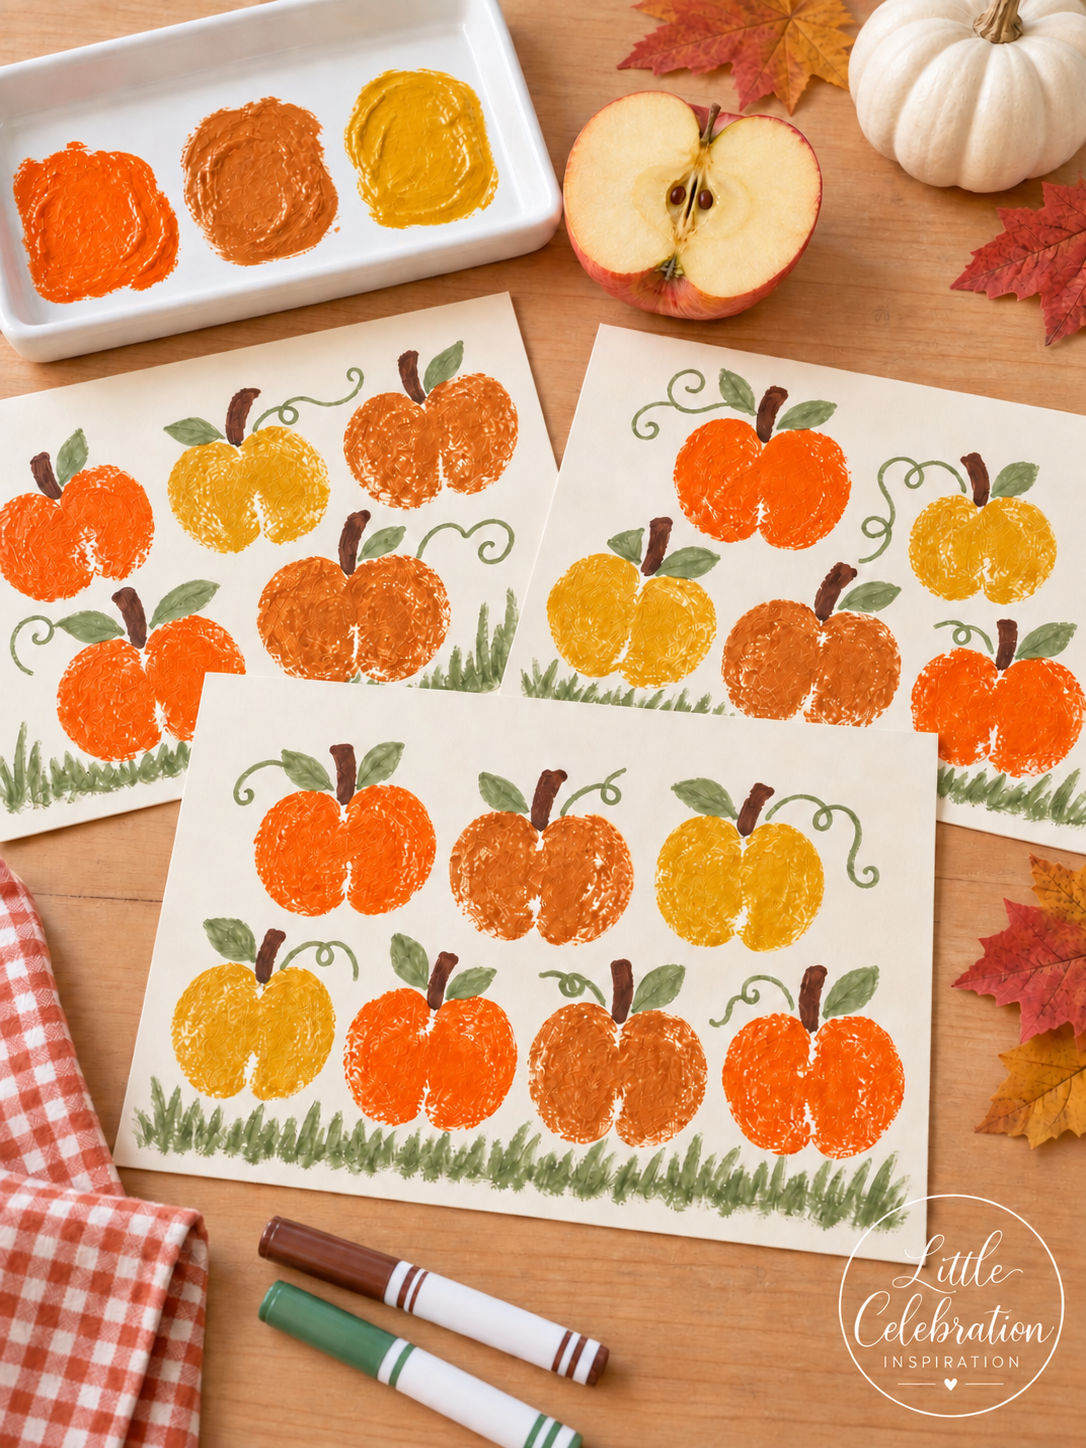
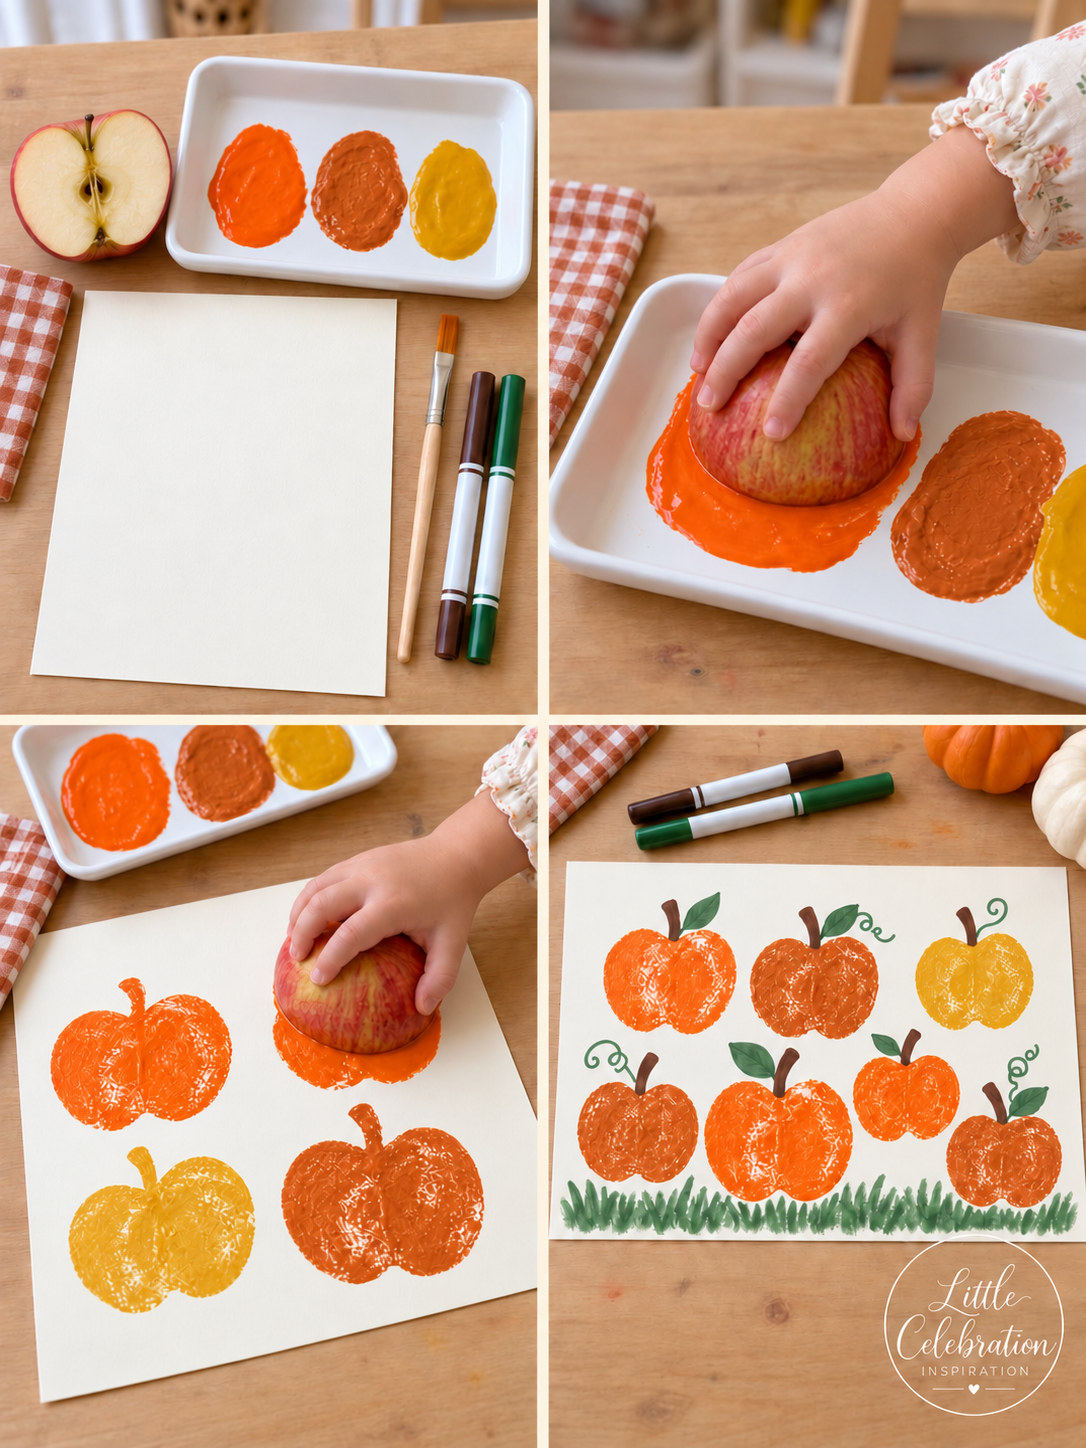
An apple half creates an easy pumpkin-shaped print with two rounded sections. Add stems, leaves, vines, and grass to turn a page of colorful prints into a cheerful pumpkin patch.
Supplies (affiliate links):
Apple
Adult knife and cutting board
Orange, golden yellow, and warm brown washable paint
Brown and green markers or paint
Directions
1. An adult should cut the apple in half from top to bottom and blot the cut surface with a paper towel.
2. Spread thin, even pools of orange, golden yellow, and warm brown paint in a shallow tray.
3. Press the cut side of the apple into one paint color, lift it, and stamp it firmly onto the cardstock.
4. Repeat with the remaining colors, leaving space between the prints. Allow them to dry.
5. Use brown and green markers or paint to add stems, leaves, curling vines, and grass beneath the pumpkins.
Helpful tip: Call the finished shapes pumpkins rather than apples by emphasizing short brown stems, curling green vines, and pumpkin-patch grass.
More Ways to Use These Thanksgiving Crafts
Set up two or three crafts as stations during a Thanksgiving gathering.
Display finished projects on a classroom bulletin board or playroom wall.
Turn the Thankful Tree into a family gratitude tradition.
Use the puppets and turkeys for storytelling or a Thanksgiving song circle.
Write children's names and the year on keepsake crafts before storing them.
A Simple Thanksgiving Activity for Little Hands
These Thanksgiving crafts are meant to feel playful, manageable, and easy to personalize. Do not worry about making every turkey, pumpkin, or leaf look identical. The uneven paint marks, creative color choices, and child-made details are what make the finished projects special.
Save this collection for November, share it with a teacher or caregiver, and choose one or two projects to make part of your family's Thanksgiving celebration.
